

A few days ago I posted about my trip to Walcheren in the Netherlands, where my other half and I cycle-camped for several days last week. I wanted to do some on-the-spot research for my upcoming biography of the 2nd Earl of Chatham, who commanded the military part of the abortive British expedition to Walcheren in 1809.
For a brief historical overview of said campaign, and an account of my visit to Vlissingen (Flushing) and Middelburg, please see my previous post. Otherwise, read on for Part 2 of my Walcheren peregrinations…
Night 3 (30 March): Arnemuiden
We spent the night at a beautiful little farmhouse with the world’s most enormous barn, somewhere on the road between Middeburg and Arnemuiden. Thanks to land reclamation, Arnemuiden is no longer just off the Sloe Passage between Walcheren and the island of Suid-Beveland. In fact, as you can see by comparing the two maps at the top of this page, neither Walcheren nor Suid-Beveland is in fact an island any more at all. The Sloe, which caused so much tension between Chatham and Strachan, the naval commander, is no more, and Arnemuiden now looks out across acres of flat farmland studded with modern windmills. The whole 1809 expedition would have been much easier now than in 1809, when there were so many narrow watery bits and so many sandbanks to navigate between Walcheren and the “ultimate objective”, Antwerp. Now Chatham would just have been able to land and march.
In 1809, however, he did not have that luxury.* Arnemuiden was therefore an important place because the troops destined for Antwerp embarked here in the troop transports during the days after the fall of Flushing in August. Between 18 and 21 August, the 8000 reinforcements Chatham had landed on Walcheren to help cope with the increased French manpower in Flushing re-embarked under Generals Graham and Grosvenor. They spent the next four to six days stuck in the Sloe, twiddling their thumbs while the naval bods continually measured the depth of the channel and inched forwards (not helped by contrary wind and general poor weather).
A few days later Suid-Beveland was completely evacuated via Arnemuiden. A large proportion of the returning British were by this time very ill and the medical department, caught on the hop, had no resources to deal with them.
*Don’t even get me started on Strachan’s supposed suggestion of 1 August 1809 that Chatham land the men destined for Antwerp on Suid-Beveland and march them across the island to embark for Sandvliet, instead of sailing them through the Sloe Passage: “With him alone was there an option between a March of 36 hours, and a Voyage of an indefinite length”, etc etc (Strachan’s narrative, 5 March 1810, NA PRO 30/8/260 f 52). For more on that, see my book when it comes out.

Evacuation of Suid-Beveland, 30 August 1809 (from here)
One of Sir Eyre Coote’s ADCs reported: “We are not sufficiently supplied with Medical Officers or Medicines … [the sick in Flushing are] laying on the bare boards without Paillasses & many without Blankets. By an unfortunate mistake the Hospital Stores were shipped [from Suid-Beveland] with those of the Quarter Master General’s Department, and the Vessels being off Batz [Bath], no supplies can be received for the Habitants on this island”. The sick who arrived at Arnemuiden were “moved in Waggons” to Flushing, which (having been so recently bombarded) had very little accommodation that was not bomb-damaged in some way. (Journal of the Walcheren Campaign, University of Michigan Coote MSS Box 29/3) Here they continued to lie, two or three in a bed under hastily-erected tarpaulins to keep out the weather, while Chatham waited for instructions to send the rising numbers of sick back to England. These took so long in coming he eventually had to start sending the sick home without orders.
We didn’t spend much time in Arnemuiden, which we entered only to purchase some food to cook, but (fittingly) I was eaten alive by mosquitoes during the night. There were clouds of the blighters everywhere we went on the island, even in late March. I swatted a fair few of them, which did little in the practical sense but made me feel a bit better as a historian.
Day 4 (31 March): Arnemuiden – Veere – Grijpskerke – Breezand
We had had some thoughts about going down to Bath on Suid-Beveland, which was the closest Chatham and his men ever got to Antwerp (about nine miles away), but although we would have had time, we heard there was little to see there: the fort where Chatham stayed was gone, and land reclamation meant the territory had changed beyond recognition. We decided to stay on Walcheren instead, and see more of the “important stuff”.
Next day we were up bright and early and cycled the short distance along the canal to Veere. Veere was one of the more important towns that fell to the British on 1 August 1809: without possession of Veere, which defended the entrance to the Sloe Passage, the British ships could not proceed from the East to the West Scheldt. (The final link in the chain, Fort Rammekens, surrendered on 3 August.)
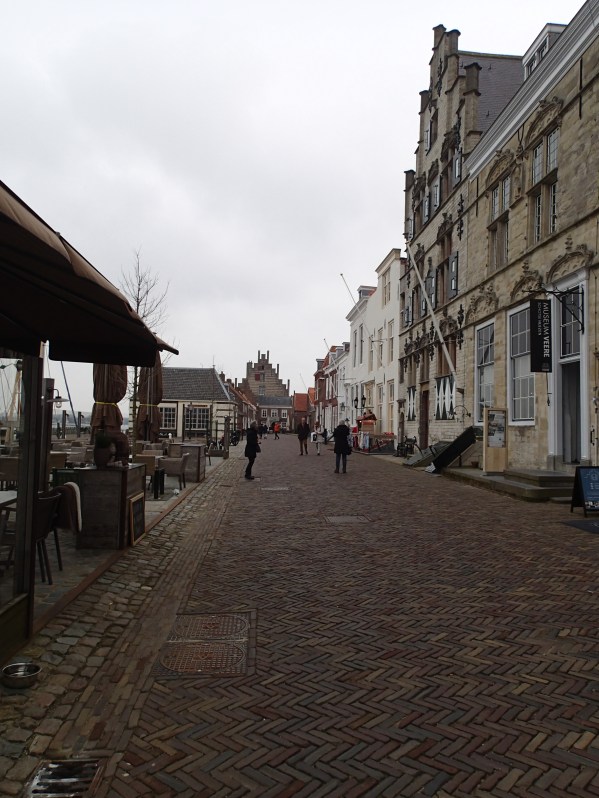
Veere, by the canal
The centre of Veere probably hasn’t changed a great deal since 1809, although the town itself has got a lot bigger. The houses along the harbour’s edge are all 16th-17th century types, many probably older, and the place with its cobbled streets and CONSTANT bell-ringing from the Town Hall bell-tower has a lovely old-school feel to it.
Mind you, it probably wasn’t such a nice place to be on 1 August 1809, when General Fraser laid siege to it and bombarded it into submission. He was assisted by Home Popham, who brought several gunboats into play from the sea side. Assaulted by both army and navy, Veere surrendered within the day.
Popham’s unauthorised use of gunboats got him (and Chatham) into trouble. When Sir Richard Strachan found out that his boats were being brought close to the town walls, he gave orders for them to fall back. He immediately Chatham an extremely irritated letter, which must really have started things off between the two commanders on a great footing:
I cannot approve of the manner in which the Naval force has been applied this Morning to the great waste of Ammunition & Stores, without effecting one good purpose. I shall be most happy my Lord at all times to meet your wishes and to forward by every means in my power the operations of the rmy even if I did not feel that I was personally Concern’d in the Success of its operations, but I hope whenever your Lordship wishes to have the navy employ’d in a particular way that you would be pleased to signify your wishes to me. (NA PRO 30/8/369 f 70)
He may have had a point, as several gunboats sank during the bombardment.
Unlike Flushing, which shows no sign whatever of the British assault, a few of Veere’s houses on the canalfront have a few interesting architectural additions:


I’m fairly sure there has been a little “touching up” since 1809, but I am reliably informed these bad boys were launched either by Popham’s gunboats or Fraser’s batteries. There’s no fanfare about it, still less a plaque, but if you keep your eyes open you will see several houses with these interesting talking-points in various places.
Something else I found interesting in Veere was the Scottish connection. It seems one of the Lords of Veere in the 15th century married a daughter of the Scottish King. One of the clauses of the marriage contract was that Scots traders would have exclusive rights to trade from Veere, then a big commercial port (so long as they promised not to interfere with Dutch continental trade). In the 18th century, the Scots were still a big presence in Veere, and even had their own name for the place (“Cam Veere”). I had noticed one or two contemporary sources mentioning the Scots in Veere, but presumed they were talking about the 71st regiment, which I believe participated in besieging the place. It seems the reality was much more complicated.
Veere is no longer an atlantic trading station. It has been overtaken by bigger commercial centres, but the Veere Gat channel between Walcheren and Noord-Beveland has now been closed off by the Veere Dam, creating the Veere Sea. Had Home Popham attempted to sail the British fleet into the Veere Gat now, he’d have run into trouble fairly swiftly.

On the Veere Dam, looking out towards the Veere Sea (and probaby standing right where Popham sailed the British fleet in 1809…)
We spent some time wandering the streets of Veere, visiting the museum, and being driven half-demented by the tinkling of the bells (I don’t think I have ever heard bells replicate a baroque trill before), before leaving for our accommodation at Breezand.
On our way up we passed through Grijpskerke, which was where Chatham established his second headquarters on Walcheren on the night of 31 July 1809. Chatham had never intended to set foot on Walcheren: according to the original plan (see my first post) he had meant to stay with the main part of the army sailing down the West Scheldt to Sandvliet and Antwerp. Due to the poor weather conditions that drove nearly the whole expedition into the Roompot, however, he ended up on the wrong side of the island, and decided instead to shadow Sir Eyre Coote’s siege of Flushing.
Coote wasn’t best pleased by the arrangement, particularly when Chatham and his staff kept stealing all the best accommodation everywhere they went: “The Commander of the Forces, with all his collateral Staff, arrived at Grypskerke at the same time as we did, and so crouded the place, that it was with difficulty, we could obtain a lodging”. (Journal of the Walcheren Campaign, University of Michigan Coote MSS Box 29/3)
I can see why, as Grijpskerke was, and still is, tiny tiny tiny. But it was very cute, and had a neat little Protestant church in the centre, which begged to be photographed.
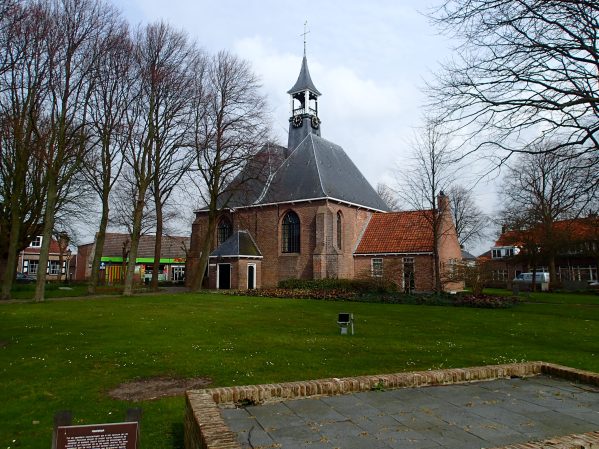
Church at Grijpskerke
We continued cycling to Breezand. I was looking forward to seeing the place where the British actually made their landing in the evening of 30 July 1809. Breezand was not the originally chosen landing place. The first landing place selected for the expedition, in July 1809, was the broad beaches at Zouteland, a couple of miles north of Flushing, but Strachan insisted on landing further away when the French brought their fleet out into the Flushing roads.
The plan was therefore changed in late July to land near Domburg, at the south-western tip of the island, further away from Flushing but still on the right side of the island. Due to the south-westerly gale on 29 July, however, Domburg became unsafe for landing. The only viable place was Breezand, sheltered by the Roompot and by nearby Noord-Beveland, where the French were in any case not expecting the Brits (… and why would they have been? Breezand was at the WRONG BLOODY END OF THE BLOODY ISLAND).

Breezand, looking towards Veere Dam (formerly the Veere Gat)
The British landed in the evening of 30 July 1809, once the storm had calmed down a little bit. They encountered minimal resistance and swiftly beat back the French through the scrubland along the top of the dunes, taking Fort Den Haak in short order and chasing the fort’s garrison to the gates of Veere (where they were fired on and forced to retreat).
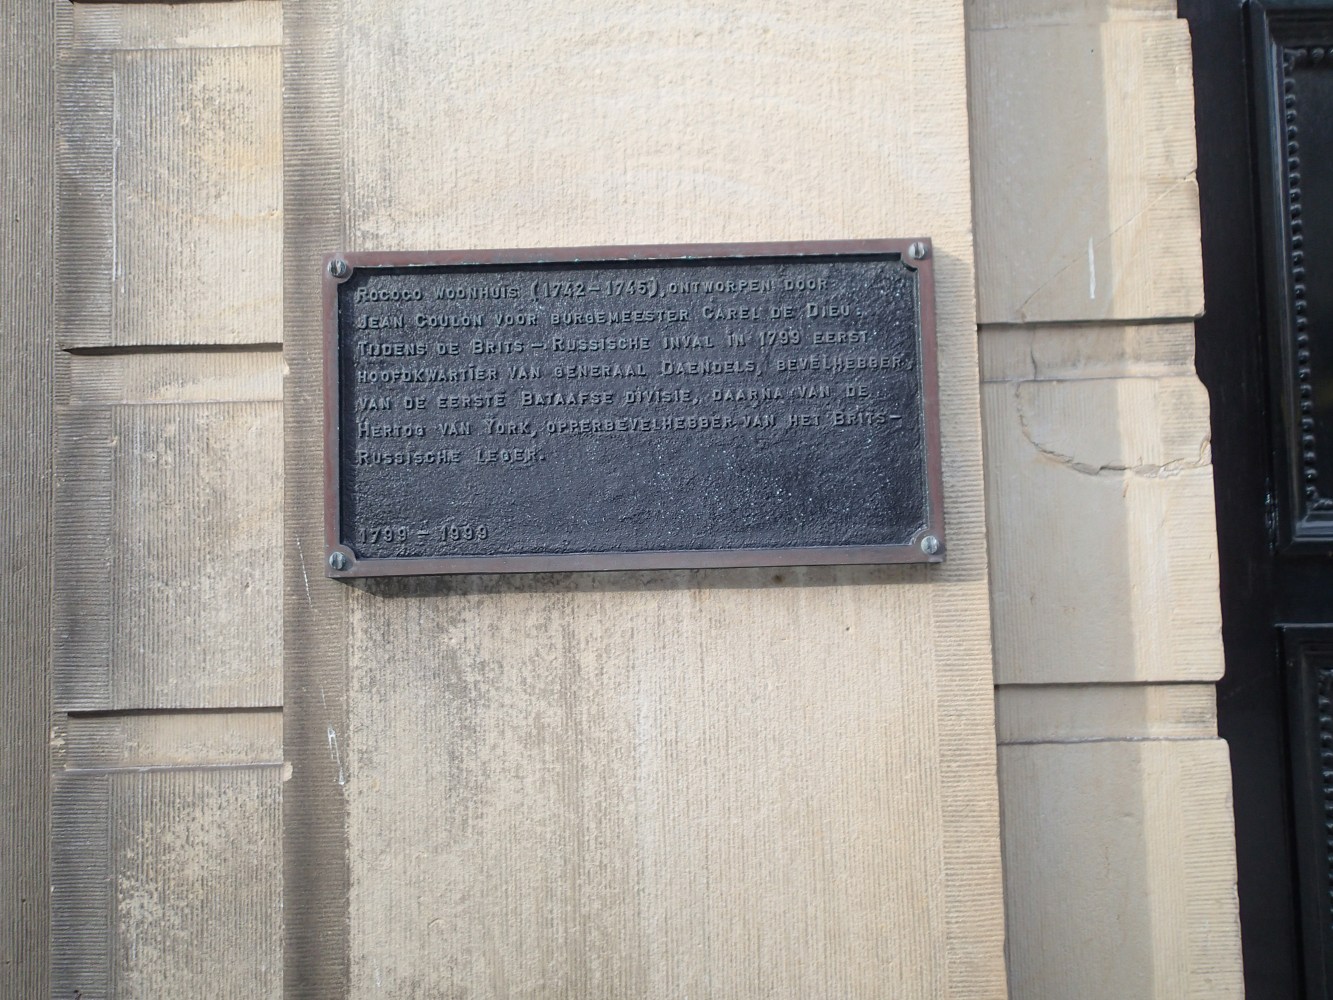
Fort Den Haak no longer stands (destroyed by the British before they left in December 1809), but there is a plaque. This was the only obvious recognition I saw anywhere on the peninsula acknowledging that the 1809 expedition had taken place. Poor Lt-Gen Fraser, though (the highest-ranking casualty of “Walcheren Fever”) gets saddled with responsibility for the whole expedition, just because he happened to command the taking of the fort. Not sure who’d be more annoyed about that, Fraser or Chatham!


Breezand is now a holiday resort, so we were spoiled for choice in terms of campsites. The one we chose had direct access to a private area of beach, only a half kilometre or so from Fort Den Haak. The beach was broad and very clean, fringed with shallow sandhills (they were not hard to climb) and topped with a tangle of prickly gorse and twisted birch.
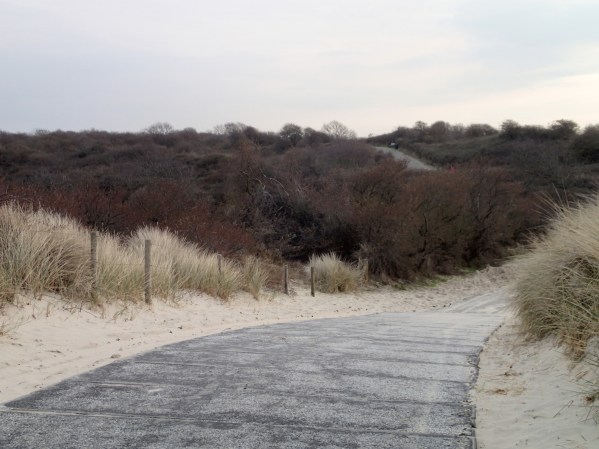
Road through the sandhills to Breezand
I visited there about 7pm on a beautiful evening. It was the last day of March, so not the end of July by any means, and of course the British landed after a storm when the sea was still very choppy, so the conditions were in no way alike. Still, I was almost entirely alone, and I felt there was very little but time separating me from the landing two hundred years previously.
I even saw some riders on the beach, and wondered whether it was an echo through the ages of Chatham and his staff riding to Fort Den Haak for the night.

Horse riders on Breezand
Apparently the night following the landing was wet and cold. Ours was definitely cold, but beautifully clear. I saw a shooting star over Middelburg (which, in daylight, you could just make out on the horizon from the top of the dunes).
Part 3/3 follows shortly, taking us all the way round the island and back to Flushing…


